
If like me, you have many wood scraps, you can make beautiful decorative Christmas trees out of them with a little time. I made two different sizes of trees, the larger one is 8.5 inches tall and 4 inches wide, and the smaller one is 7 inches tall and 4 inches wide. In addition, these homemade Christmas trees can glow in the dark.

Materials and parts:
- Wood scraps;
- Epoxy Resin;
- Resin Coloring Agent;
- Starlight glitter;
- Sandpaper;
- Lacquer, mineral oil, or Howard Feed-N-Wax Oil;
- 7 ft., 20 LED Wire Fairy Lights Battery Operated – https://s.click.aliexpress.com/e/_DkaVT7P.
How to make toy Christmas trees from wood and resin
So to the begin, I’m just going to start breaking these scraps down into thin strips and I’m looking for you know the width of them here to be around an inch and a quarter. A measurement I went with um you know you can use whatever size works for you.
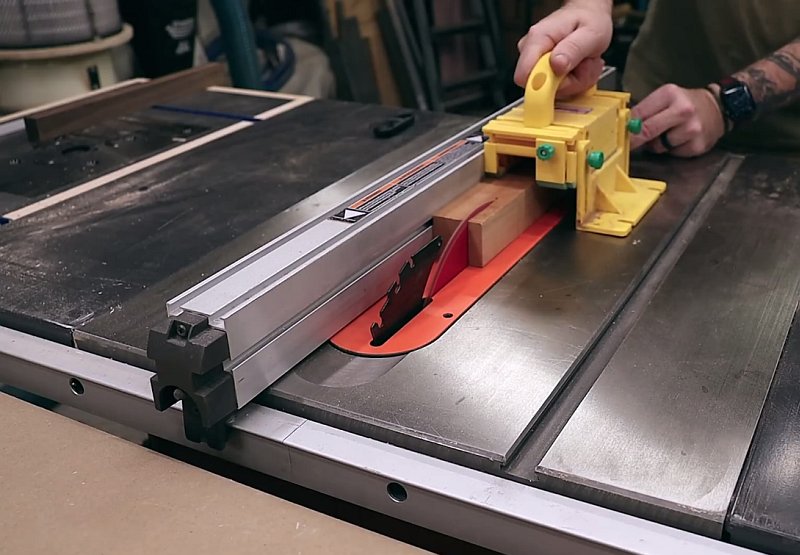
Now I’m just breaking this down into thin strips, you could use for this the table saw and skip this step I choose to use a bandsaw just because I felt it was a little bit safer with this small piece of wood. I sawed these pieces of wood into narrow strips.
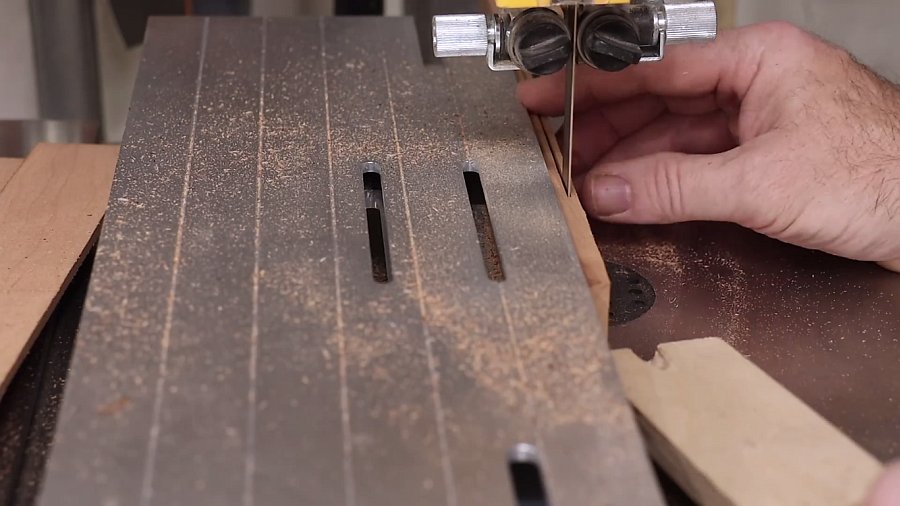
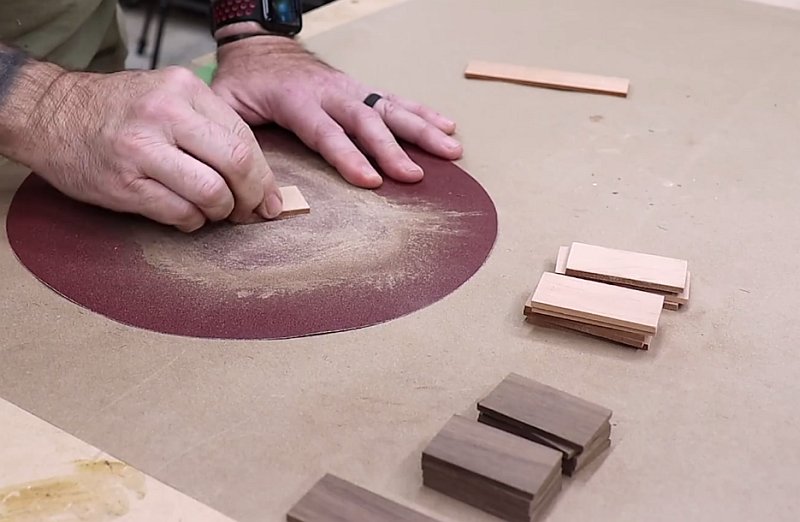
Now we need to smooth out the surface of the planks and get rid of the bandsaw marks. I will use my drum sander but you can use sandpaper on a smooth flat surface.

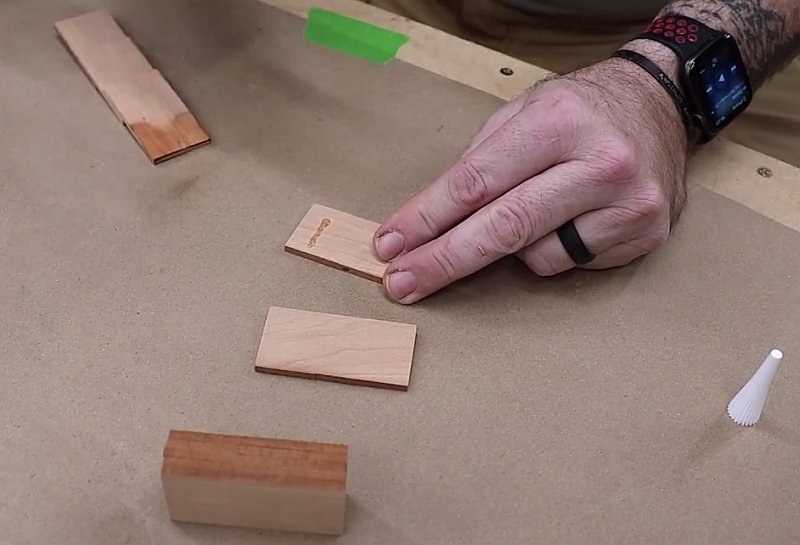
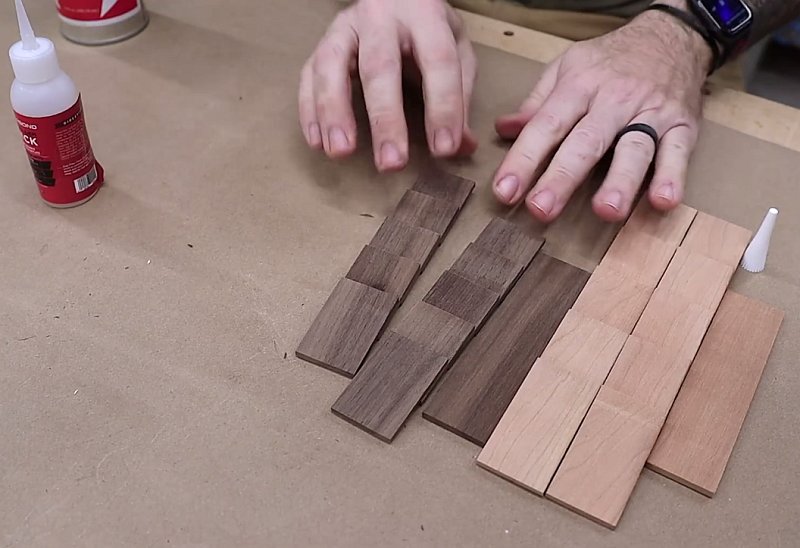
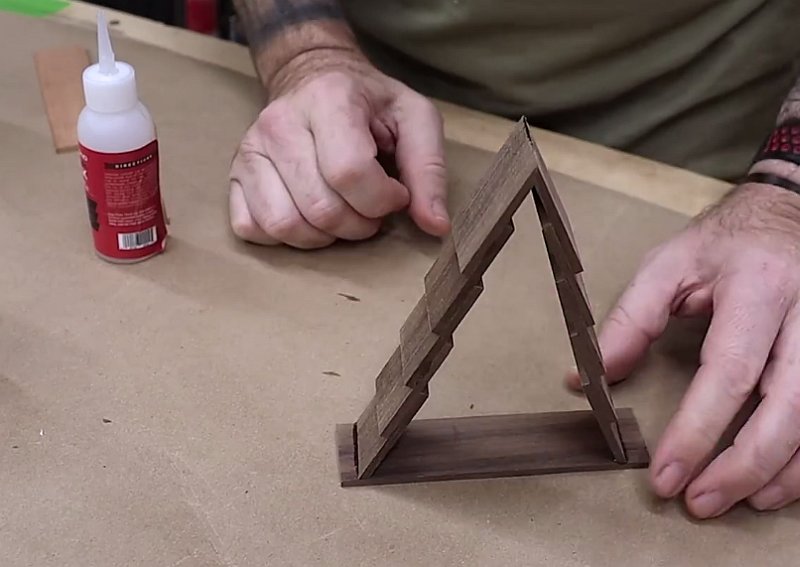
Let’s cut strips of wood into equal sections. Each side of the Christmas tree consists of five pieces, and the base of the tree is one piece. I am making two trees today, one large and one smaller. For the small tree, each of the ten pieces is 2 inches, and for the large tree, it is two and a half inches. The size of the base for each of the trees is five inches, and it will be adjusted in the future.
Now a little sanding all sides of the wooden parts, making a little roughness before gluing them together.
All right, now I need to but a line at an inch and that is where the pieces a going line up, so I just got my square here set to an inch, I will just put it up in there and I just mark it.
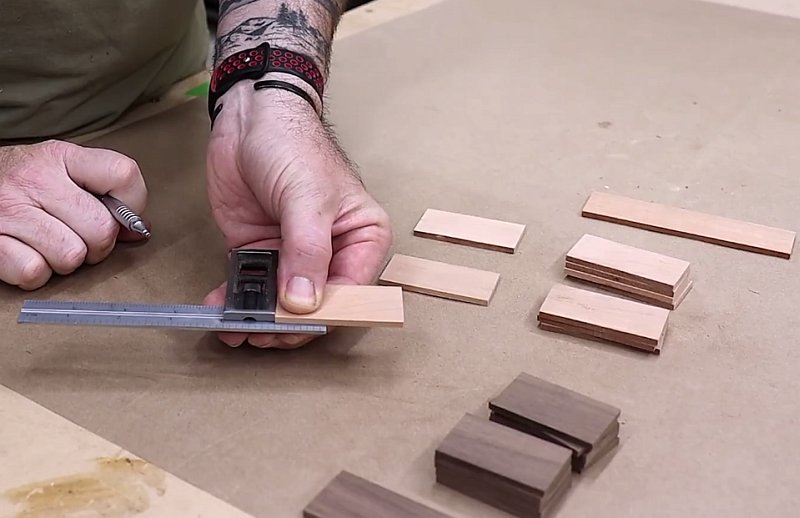
Now you can go whatever spacing you want but this works out for my needs.
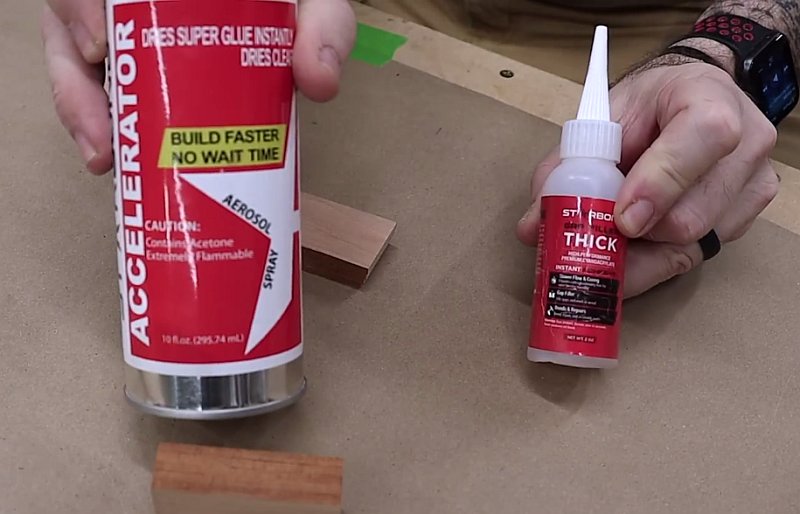
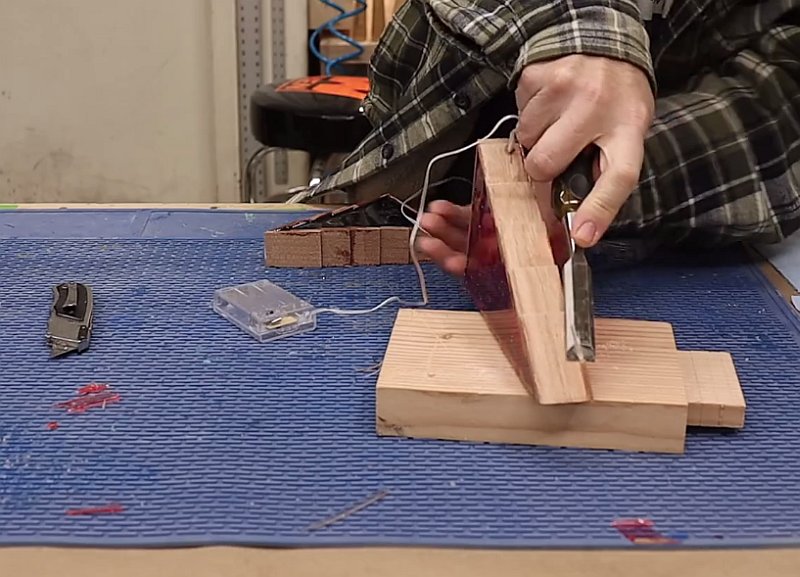
So I’m just going to use some “Starbond thick” and some accelerator just to hold it together, it’s not going to be a permanent connection because the resin is going to hold it together but it just helps hold it together until I get to that point.
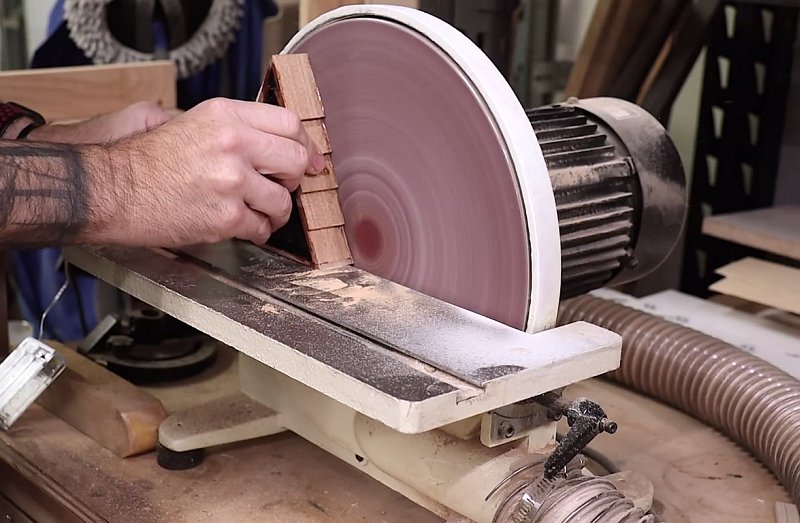
After gluing the pieces together, I go to my grinding wheel and make the right angles. So I’m just eyeballing the angle here I’m using a square to make sure I’ve got it flat and then I’m just going to keep trying until I get a good fit and then I go back to the sander just until I get that perfect.
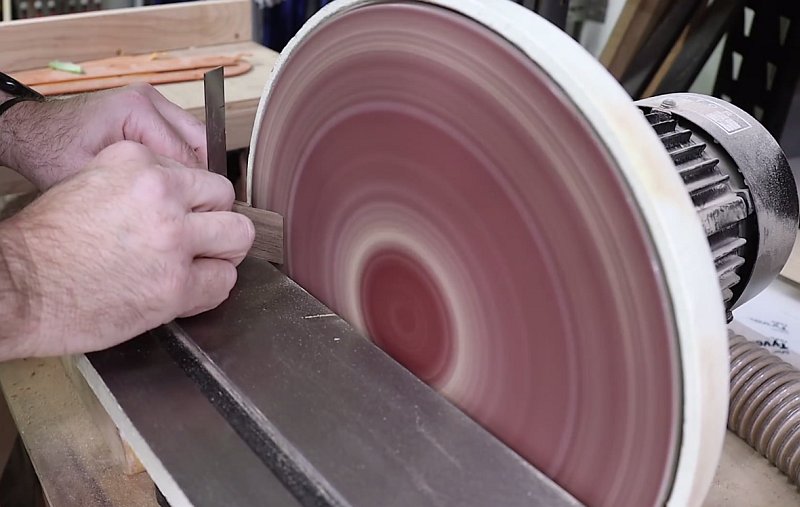
Fit now that I’ve got the peak of the tree glued up I can go back to the sander and get the bottom flat and that just allows me to get a good tight flat connection here.
Therefore, I left the bottom piece long and I could just come over here to the disc sander, clean that up, and just get that perfect angle at the bottom.
I want the bottom of this to be completely flat so that when I go to glue it to the Plexiglas it has a tight connection and not going to have any leaks.
Next, I glued the Christmas tree to the Plexiglas.
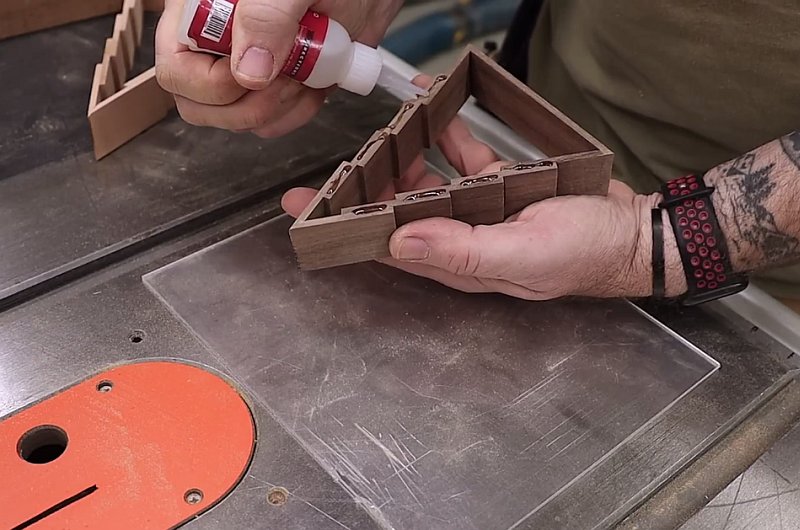
I’m using some alumalite clear amazing clear cast here, it’s going to serve two purposes. One because it’s really thick it’s going to go in and seal up that connection if I don’t have it perfect on the bottom it’s also going to seal up the wood so that it doesn’t adsorb so much of the resin. Leave to dry for 24 hours.
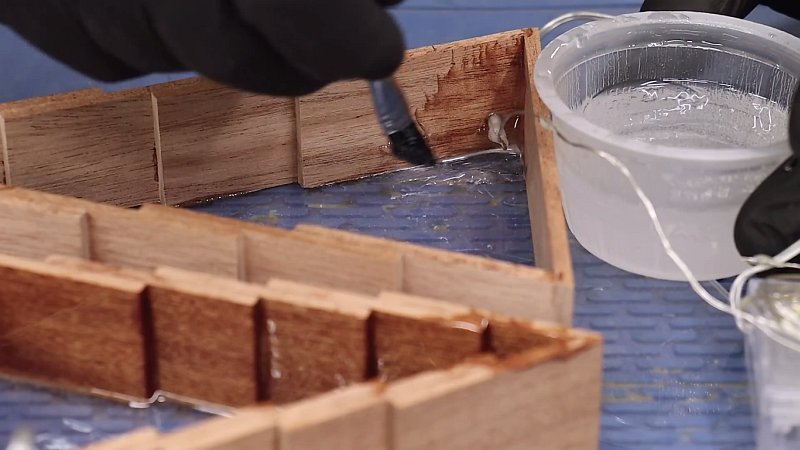
Mix a little resin and hardener and fill the bottom of the tree. I also added some coloring agents and starlight glitter to the resin. After that, I left our item to dry for 24 hours.
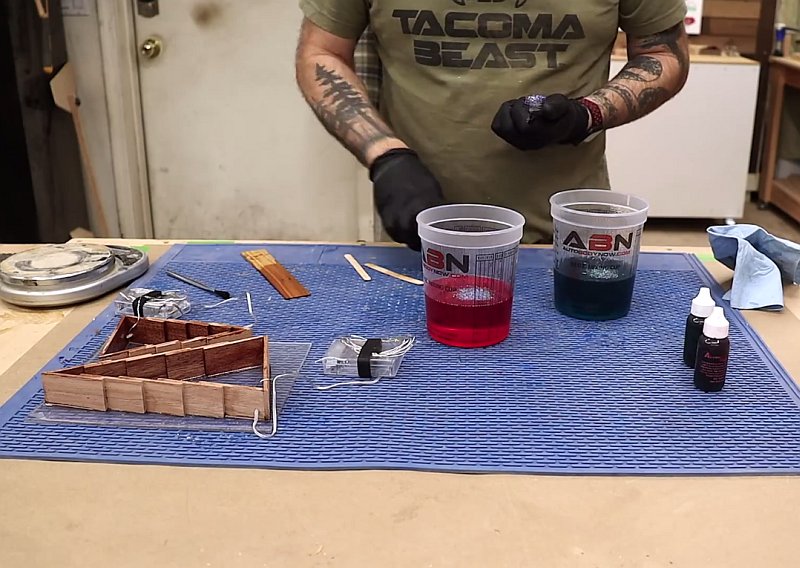
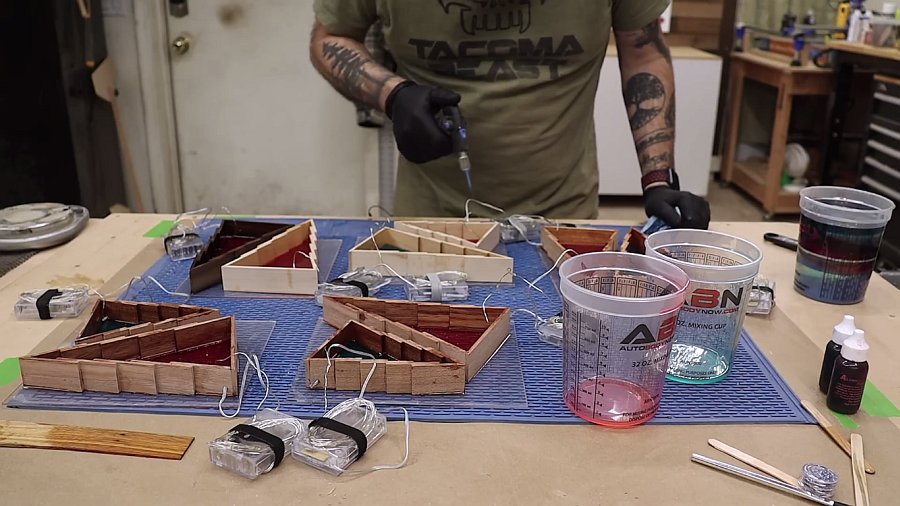
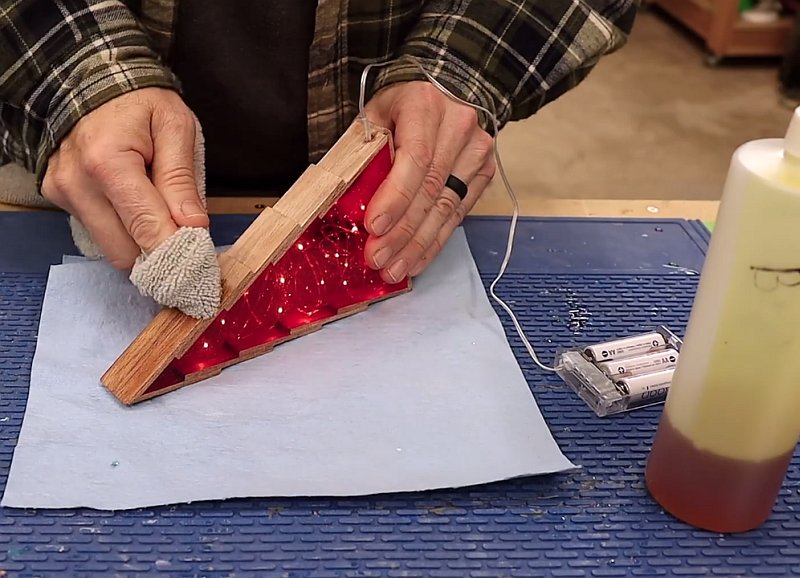
I wound the wire of the light onto cardboard and placed it neatly inside the Christmas tree.

Then I put the batteries in the holder, making sure the lights worked.

Next, I poured resin up to the edges of the tree and left it to dry for 24 hours.
I was surprised how well the Christmas tree came off the Plexiglas, I can use it in my next project.
Now you need to clean the edges of the wood from the leaked resin with a chisel or knife.
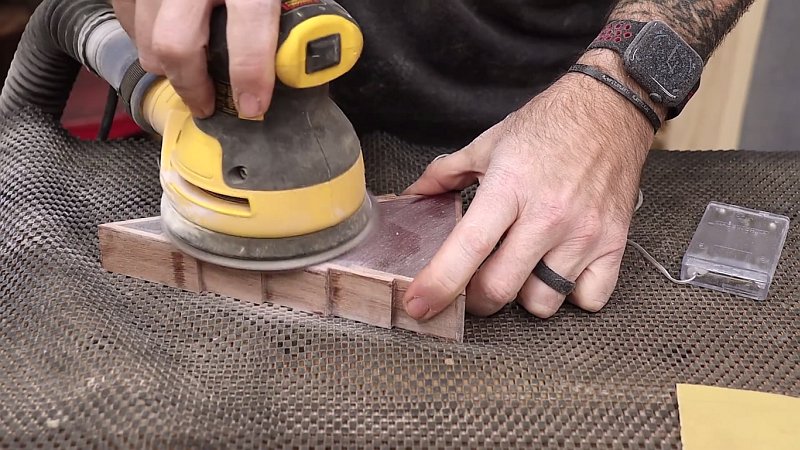
Next, using a disk grinder, I sanded the front and back sides of the Christmas tree.
To make the epoxy more transparent and smooth then you need to polish the front and back of the wood.
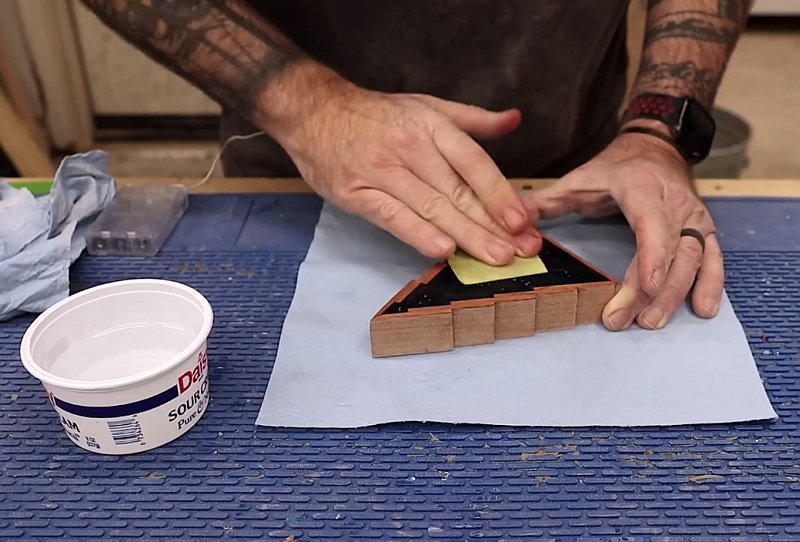
For the finish, I’m just using a little bit of Danish oil and you could use anything, Howard Feed-N-Wax Oil, mineral oil, you could spray lacquer on it, you could finish it with resin it’s really up to you.


I am very pleased with how these Christmas trees came out, I also made more of them as Christmas and New Year’s gifts. I hope you enjoy this homemade tree too. Watch the video at the end of the article as I made these Christmas trees.